In the context of the digital era, adjusting and managing IP addresses has become extremely important. IP address, the foundation of communication on the Internet, sometimes needs to be changed for various technical or security reasons. Despite being a familiar concept, not everyone understands IP well or knows how to edit it on mobile devices or personal computers. From an expert’s perspective, let’s explore deeper about IP addresses and secrets to professionally customize them.
Why Do We Need to Change the IP Address?
Changing IP addresses is not just a tool to simulate geographic locations or access region-restricted services and content. Below are the reasons why changing an IP address becomes necessary, from an expert’s perspective.
Protect Privacy and Information Safety
When connecting your device to the Internet, your IP address becomes a gateway for those who want to monitor and steal your personal information. Regularly changing your IP address will help increase protection for your data and personal information, preventing unauthorized access to your device.
Access International Content
Some websites and applications only allow access from certain countries. Changing your IP address to another country will open the door for you to access all kinds of content you want without worrying about being blocked.
Overcome Bans and Blocks
Countries and organizations often block access to certain applications and websites for security or political reasons. Changing the IP address is an effective solution to overcome these troubles, allowing you to access any service and application you need without any obstacles.
Increase Internet Speed
In areas with high internet access density, changing the IP address can help improve your access speed by reducing congestion and upload load.
Resolve Network Issues
Sometimes, many devices using the same IP address can cause conflicts and slow down the network speed. Changing the IP address can help solve this problem, bringing a smoother web browsing experience.
How to Change IP Address for Android Phone
Changing your phone’s IP address not only helps you avoid online tracking but also provides you with access to geo-restricted content. Below is a detailed guide to changing the IP address on both Android and iOS.
Step 1: Access Settings Menu
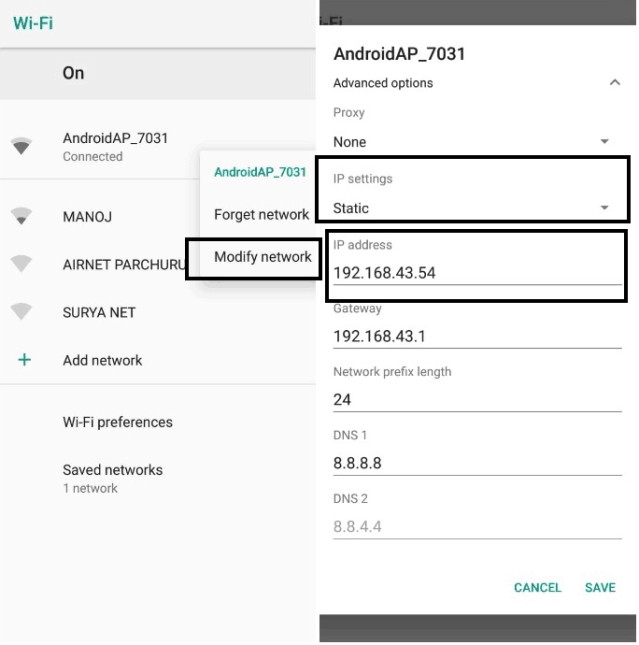
Start by opening your device and going to the “Settings”. Next, press “Network & Internet” and then select “Wifi”.
Step 2: Select and Edit Wifi Network
Keep clicking on the name of the Wifi network you are connecting to. A menu will appear, with the option “Modify Network”.
Step 3: Switch to Static IP
Proceed to change the “IP Settings” from DHCP to “Static”.
Step 4: Assign New IP Address
You can now enter a new IP address for your device. Make sure your new IP address is also in the same network range (e.g., 192.168.1.x).
Step 5: Use IP Changer App
If you do not want to perform the above steps manually, the IP Changer app can be a suitable choice. Just enter the desired IP address, and the app will automatically do everything for you.
How to Change IP Address for iOS Phone
Step 1: Go to Settings and Select Wi-Fi
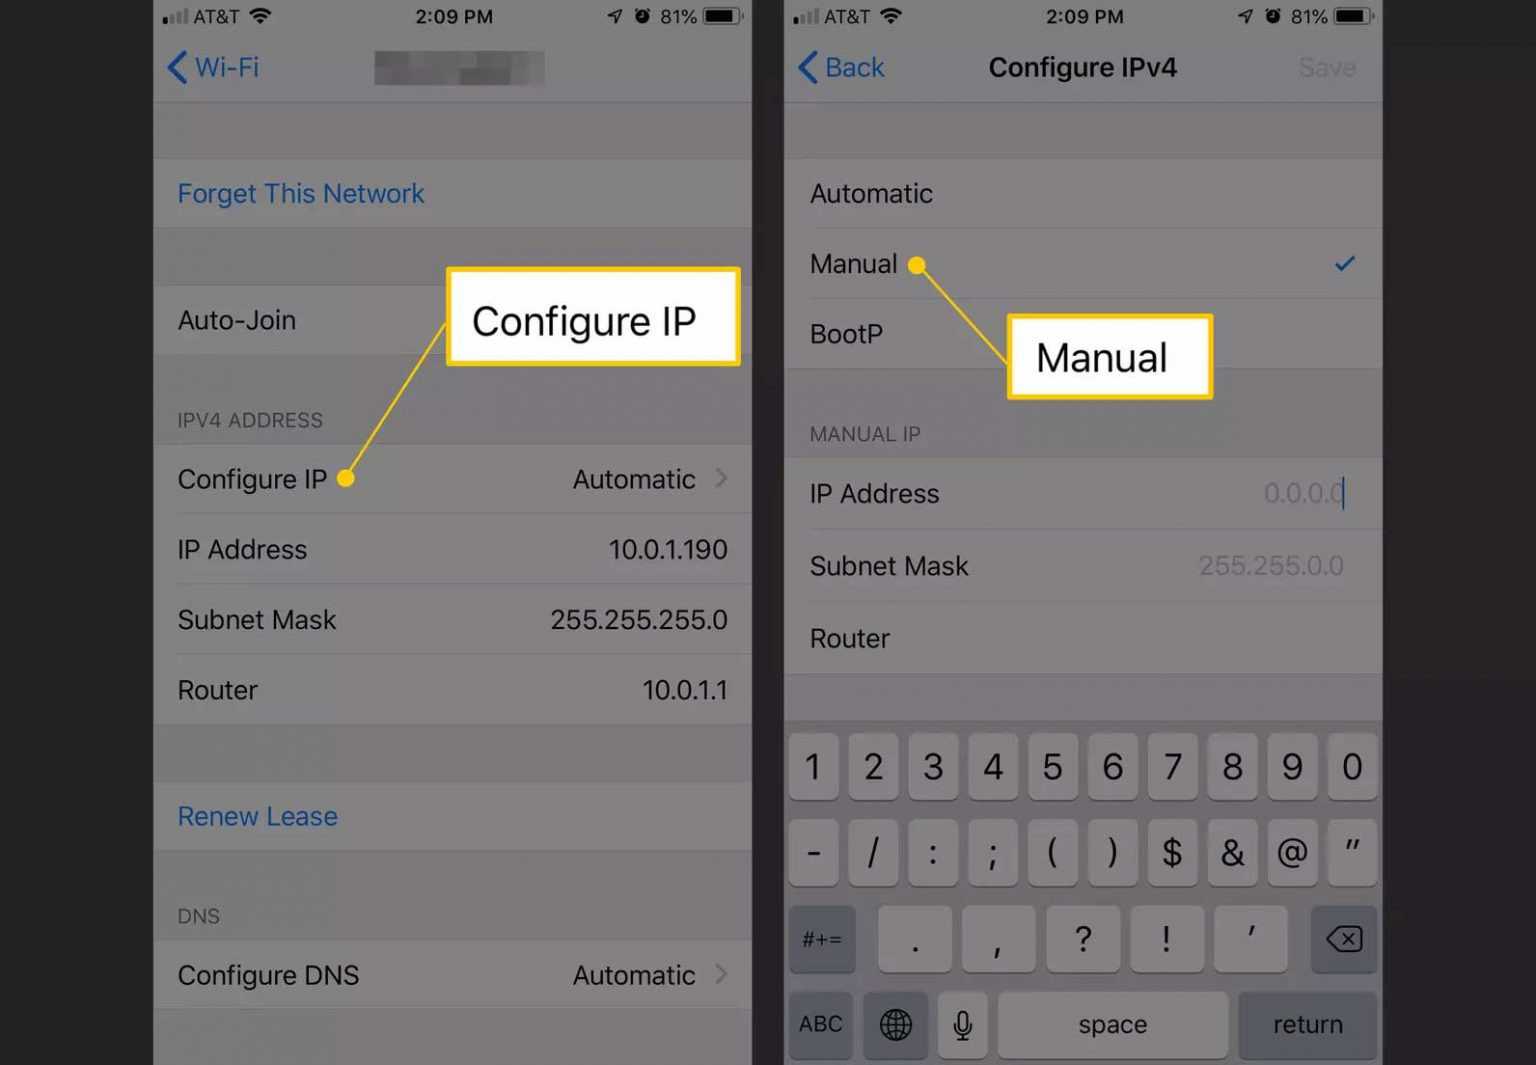
Open “Settings” on your iOS device and select “Wi-Fi”.
Step 2: Tap the Network Icon
Press the small icon (i) next to the Wifi network name you want to change the IP.
Step 3: Configure IP
Choose “Configure IP” and then select “Manual”.
Step 4: Enter Network Information
Finally, enter the IP address and DNS information you want to use.
How to Change IP Address for Computer
Below is a detailed guide from an expert on how to change the IP address on a computer running Windows 10 operating system. The process is simple and easy to perform, suitable for both new users and experienced ones.
Step 1: Access the Network Settings Menu
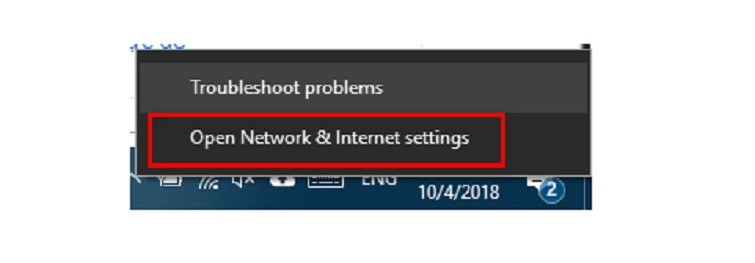
First, move your mouse cursor to the network icon in the lower right corner of the computer screen and right-click. In the menu that appears, select “Open Network & Internet settings”.
Step 2: Navigate to Network Connection Settings
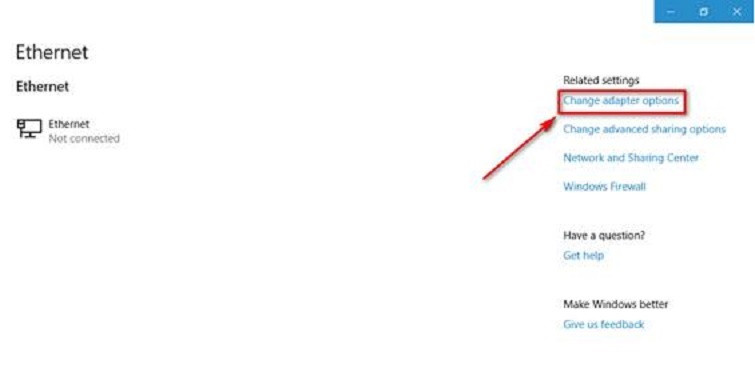
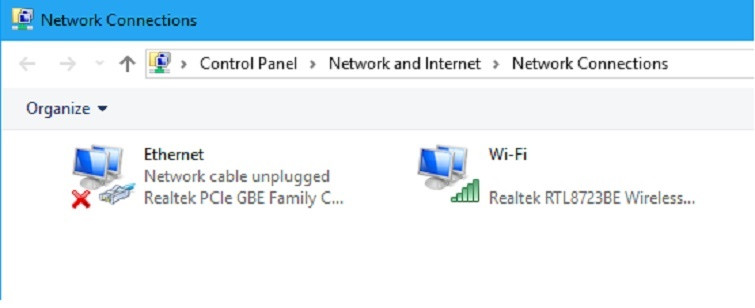
In the new window, select “Ethernet” or “Wifi” depending on the type of network connection you are using. Then click on “Change adapter options” to open the Network Connections interface.
Step 3: Access the Network Connection Properties
At the Network Connections interface, right-click on “Ethernet” or “Wi-Fi” and select “Properties” from the context menu.
Step 4: Change IP Settings
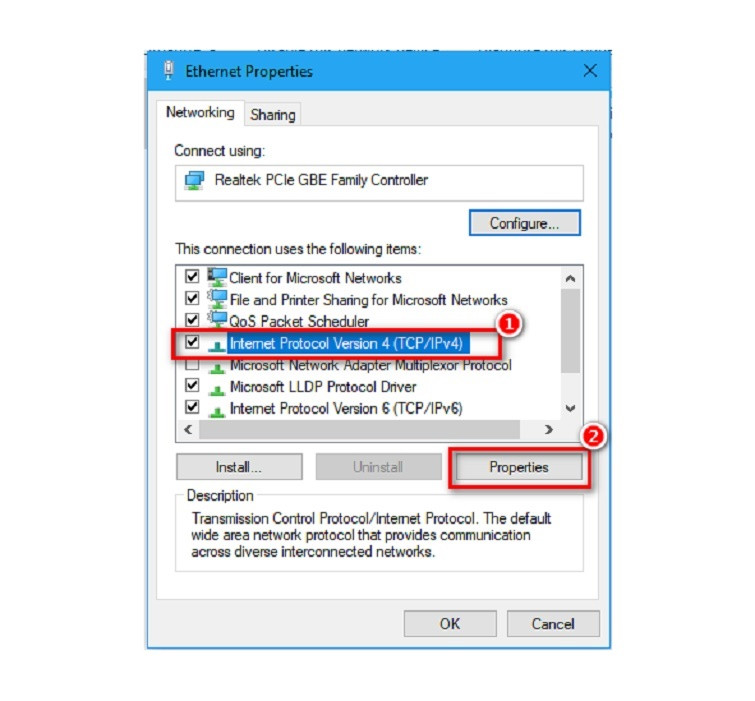
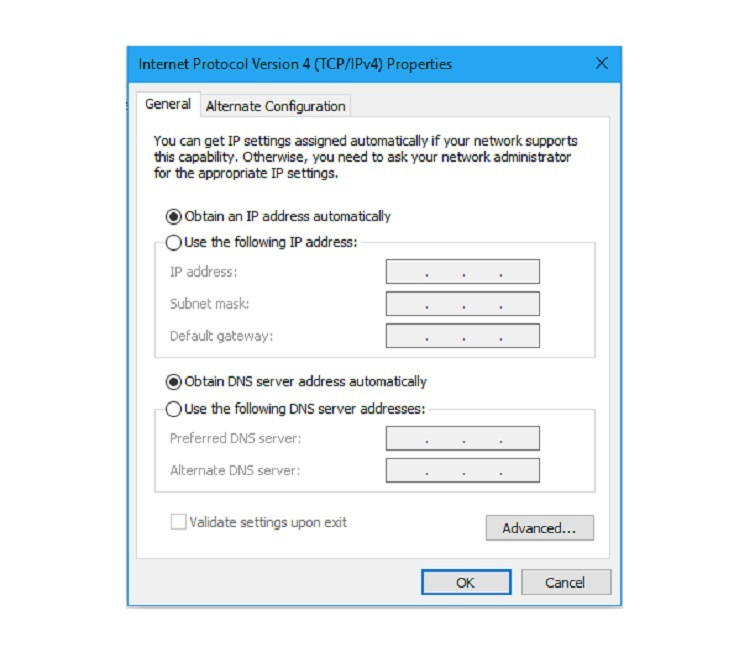
In the Properties window, find and select “Internet Protocol Version 4 (TCP/IPv4)” and then click on the “Properties” button. Here, the Windows 10 operating system is often configured to use dynamic IP, not allowing you to manually change the IP.
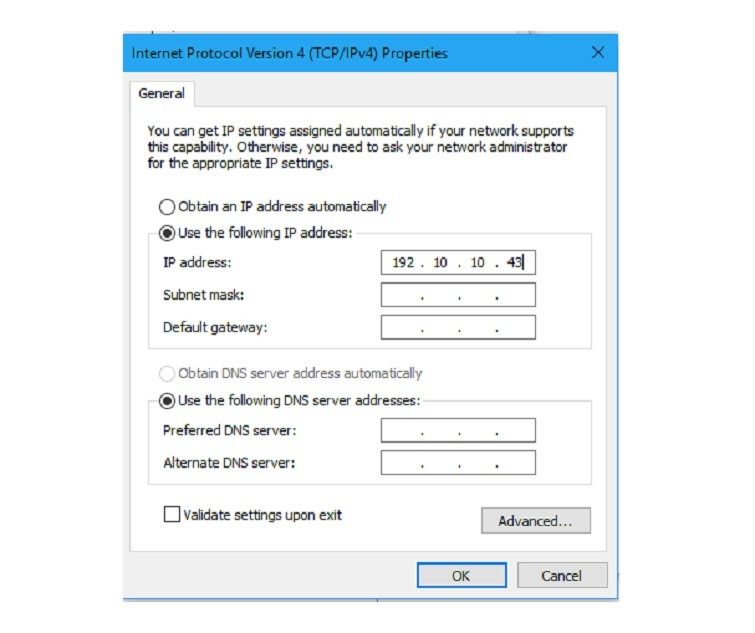
To change the IP, click on the “Use the following IP address” box and enter your new IP information.
Finally, click “OK” to confirm and apply the changes.
Buy Cheap Proxy at Proxyv6.net
When you are looking for a superior proxy service, Proxyv6.net is a choice you cannot ignore. With a wide selection range from IPv6, IPv4 to high-quality proxy types, Proxyv6.net meets all your requirements and budget. Want quick, stable, and secure access to the internet? Choose to buy cheap proxy at Proxyv6.net today!
At Proxyv6.net, we offer flexible proxy packages, meeting all usage needs, from personal to business. Easy and quick to set up, our service ensures you won’t waste time and effort. Additionally, our professional technical support team is always ready to assist you 24/7, ensuring you always have smooth and effective web browsing.
